

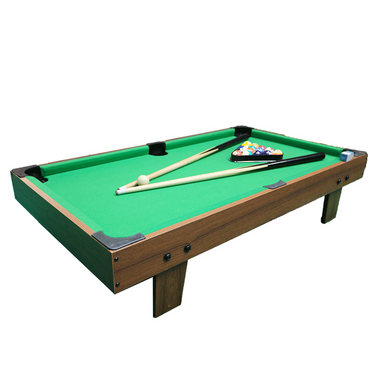
Is it difficult to replace the billiard table felt?
Billiards table uses without maintenance will have damage, peeling and scratches. This will seriously degrade the table, so you need to fix this situation immediately.
Step 1: Disassemble the billiard table
First, you need to remove all the bags hanging on the billiards table. This operation is very easy to do by cutting out the pockets or twisting the bottom brackets. You just twist the stands and keep them in the pocket and push them away from the table.
Next, you need to find the screws that secure the rails to the table top and remove them. Store the rails securely to avoid the risk of damage.
*Note*
The sides can be made from one/two/four pieces. If the billiards table rail not divides into four, you can ask a support person to keep it as safe as possible.
In some cases the holes locate separately from the rails.
Step 2: Remove the old billiard table felt
There are many ways to remove fabric easily:
- If the fabric staples, remove them with a de-tamper tool.
- If the fabric glues, tear it off the table carefully so as not to damage the lining. (unless you want to replace the lining)
Step 3: Check the balance of the billiard table surface
You can check the stone's balance and alignment by lifting the lower leg up. Secure with stickers, pieces of wood or a metal rod.
Step 4: Seal the joints on the table surface
Most pool tables will be made up of three stone slabs. If the billiards table of the table is old, the lines between the three stones may have lost the wax or putty.
Refresh the wax and putty so the countertop is as smooth as new.
Step 5: Clean & cover the new cloth on the table top
Please clean the table top by removing all dust. You can use a clean cloth to dust and wipe the surface of the table. If there are stubborn spots of dust or glue, scrape them off with a scraper or similar tool.
Step 6: Fix the fabric
Secure the fabric if the billiards table has a wood or chipboard panel underneath the stone slab. You can fix it by stitching with a special stapler.
However, if you check the edge of the table without this layer, you can glue the fabric
Step 7: Cut the fabric for the table top and into the tape
On the market, each piece of fabric is sold separately for each part of the beer table. Read the instructions carefully to avoid accidental cuts. You can slit about 2.5cm and tear easily by hand for some fabrics. For many other types, scissors or a knife will need to clean the line better.
Step 8: Spread the cloth on the billiard table
Often the sheets will brand to distinguish the two sides from each other. If there are no distinguishing marks, you can ask the seller or an expert. The surface of the billiards table each fabric on the beer table will create a different feeling when playing, so pay attention to the fabric surface.\
In addition, you need to carefully inspect the cuts and scratches to avoid having to remove them to replace the new one.
Step 9: Pull the cloth to the first side and fix it vertically with a stapler.
By pinning the fabric at an angle and having someone help you stretch the fabric until the crease is gone. Make sure that once the fabric stretches, the excess is always parallel to the edge of the table. Fix with one point after 7.5cm or more until touching the other corner.
Make sure the fabric stretches as far as possible so that the pellets are not obstruct by clear wrinkles through the strong they work.
Step 10: Repeat step 9 with the remaining sides
Move to the other long sides of the billiards table and place the stitch about 7.5cm and attach two stitches at either end of the side hole.
Cover the holes with fabric and use the rest to line the holes.
Step 11: Pin the fabric
Tighten the fabric when working on the corner if you don't want to leave wrinkles. In case the fabric is wrinkled, you need to go back to the original operation and smooth them completely. When the second short side is in its right place, return to the last long side.
*Remember to mark the dots on either side of the hole in the corner of the hole*
Step 12: Cut the fabric and fix inside the holes
Make 3 cuts in the fabric with each hole in the billiards table. Then, fold the fabric and secure it with a stapler in the hole. Use scissors or a knife to cut the rest.
Step 13: Use glue to fix the fabric
Cleverly use specialized glue to fix the fabric and make sure not to let excess glue flow out. This will lose the aesthetic of your pool table.
Step 14: If the fabric cannot pin, what to do?
In case your pool table does not have wood under the stone, you will need to use spray glue (3M Super 77 glue). If the table is made of wood, you should buy a stapler to fix it.
Protect the edges of the table from excess glue by wrapping a layer of newspaper. Stick the sheets of paper to the edge before laying the fabric a while ago.
Step 16: Change the cloth on the table top
Cut the fabric according to the following instructions:
Find the party and spread the cloth on the billiards table: If the top part is not marked, identify it by feeling the surface material of the fabric (it can be smooth or slightly fluff). Spread the fabric on the table, leaving only 5cm on the shorter side and start gluing. Make sure the canvas is perfectly parallel to the edge of the table.
Fold the end of the cloth back on the first side and secure along the edges of the table with glue. Apply glue to the edge of the table and let the glue dry for the time indicated on the package.
Step 17: Paste the fabric
Stick the cloth to the billiards table: Place the glued cloth and press it down on the table surface. Then, continue to draw along the edge of the fabric. Pull with enough force to stretch the fabric from start to finish so it doesn't wrinkle.